
There is nothing quite as frustrating as stepping back to admire a new shelf or a piece of trim, only to realize it’s tilting slightly to the left. You pull out the level, and sure enough, that little bubble is mocking you, floating just outside the center lines. It drives you crazy, doesn’t it? Precision in carpentry isn’t just about making things look pretty; it’s about structural integrity and making sure things actually work the way they’re supposed to. When we talk about home improvements in Chandler, getting the measurements right is the difference between a door that latches with a satisfying click and one that drifts open every time the A/C kicks on.
It Starts Before You Even Pick Up a Saw
Here’s the thing: most people think carpentry is mostly about cutting wood. Honestly? It’s about 80% measuring and thinking, and maybe 20% actually making sawdust. If you rush the setup, you ruin the finish. It’s a hard lesson to learn, usually involving a wasted stack of expensive lumber and a lot of colorful language.
When we tackle carpentry projects at East Valley Handyman, we start with the mindset. You have to slow down. In our fast-paced world, everyone wants to get to the finish line, but wood doesn’t care about your schedule. If you measure a board at 45 inches and cut it at 44 and 7/8, that gap is going to stare at you forever.
The Arizona Factor
Living here in the East Valley adds a weird twist to carpentry that people from other parts of the country don’t always get. It’s dry here. Really dry. Wood is a natural material—it breathes. It expands with moisture and shrinks when it dries out. In Chandler, we see wood shrinkage happen faster than almost anywhere else.
If you install baseboards or crown molding tight against the wall during a humid monsoon week without accounting for the dry months, joints can pull apart later. A good handyman knows how to acclimate the wood. We let the lumber sit in the room it’s going to be installed in for a few days. It lets the wood relax and adjust to the home’s humidity level. It sounds like a small detail, but it prevents those ugly hairline cracks from showing up three months later.
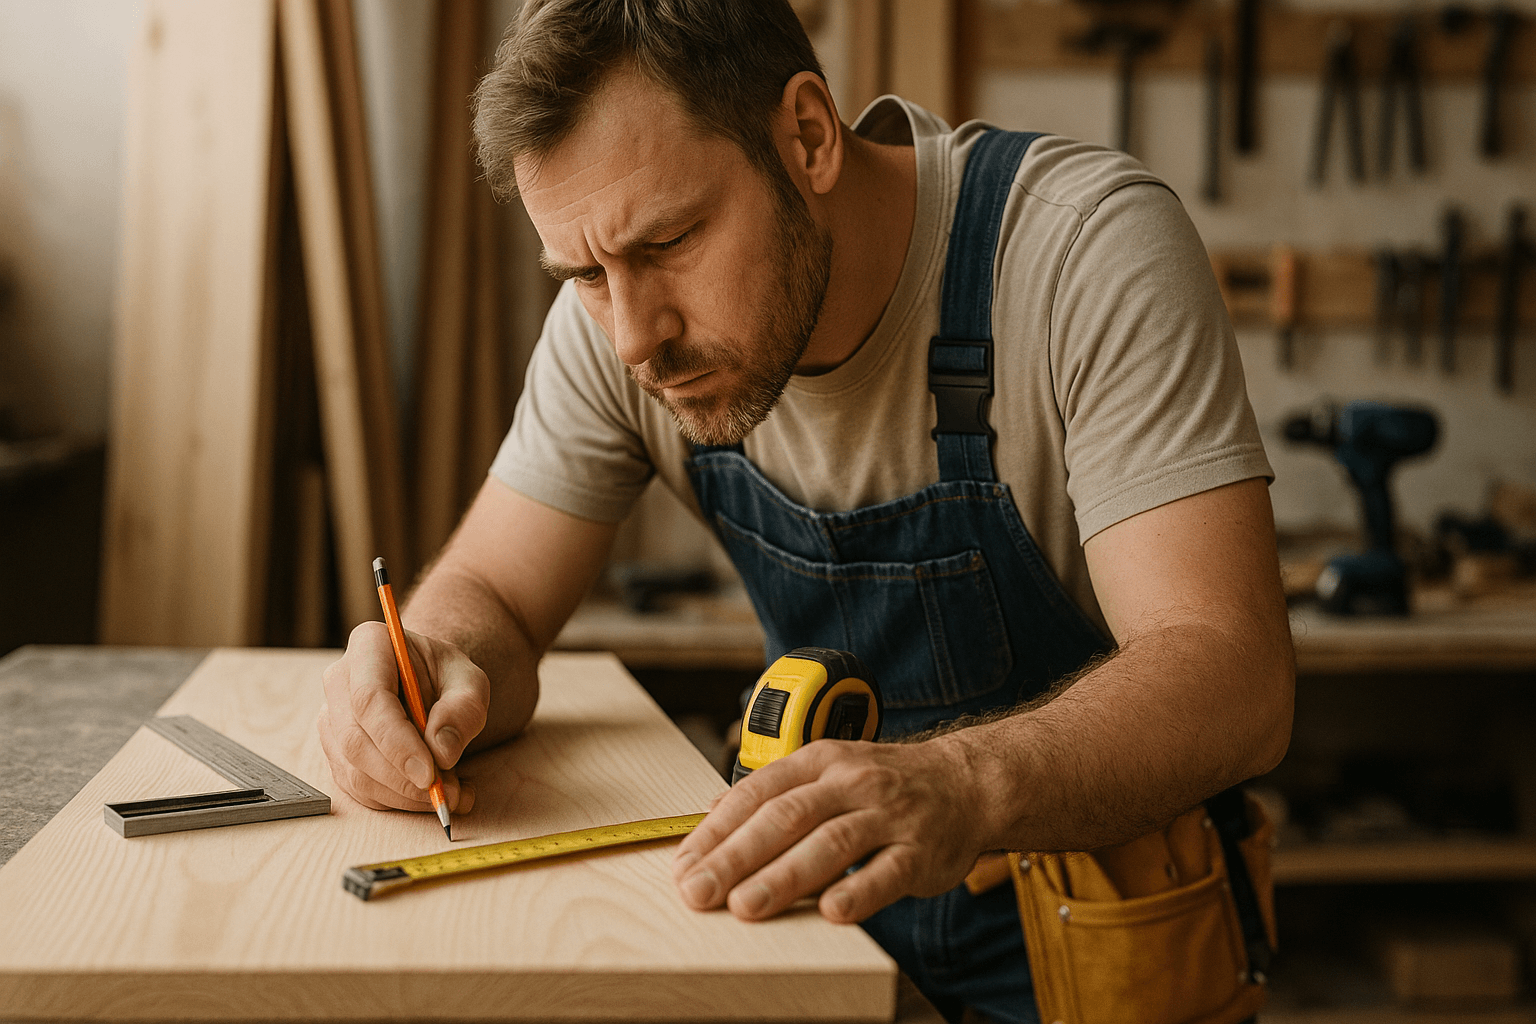
Trusting (and Mistrusting) Your Tape Measure
You might have heard the old saying, “Measure twice, cut once.” It’s a cliché for a reason, but let me tell you, it’s not just about reading the numbers. It’s about understanding the tool.
Have you ever noticed the metal hook at the end of your tape measure is loose? It wiggles back and forth. A lot of homeowners think their tape is broken and try to hammer the rivets tight. Please don’t do that! That wiggle is intentional. It’s called “float.”
- Pushing: When you push the tape against a wall to measure an inside corner, the hook slides in to account for its own thickness.
- Pulling: When you hook it onto the end of a board, it slides out.
That movement ensures that your measurement is accurate regardless of how you hold the tape. But here is a pro tip that takes it a step further: Burning an inch.
Sometimes, the hook gets bent. Maybe you dropped it off a ladder (we’ve all been there). If you need extreme precision, say for fine furniture repair or detailed trim work, don’t start at zero. Start at the 1-inch mark. Line up the 1-inch mark with the edge of your board, measure to your length, and then do the math to subtract that one inch. Just don’t forget to subtract it, or your board will be exactly one inch too long. That happens more often than I’d like to admit.
The Art of Marking: Why Pencils Matter
You might grab whatever writing utensil is handy—a Sharpie, a crayon, a dull carpenter’s pencil. But if you are trying to do accurate finish carpentry, the thickness of your line matters. A standard carpenter’s pencil creates a line that is about 1/16th of an inch thick. If you cut on the left side of that line versus the right side, you’ve already changed the length of your board.
The “Crow’s Foot” Technique
Instead of drawing a straight line, try marking a “V” or a crow’s foot.
- Measure to your specific point.
- Make a small mark.
- Draw two diagonal lines that meet exactly at that specific point, forming a V.
The point of the V is precise. A line is ambiguous. When you bring your saw blade down, you aim for the very tip of that V. It’s a small trick, but it changes everything when you are trying to fit a shelf into a tight alcove.
Understanding the “Kerf”
This is a term that gets thrown around a lot in the trade, but it often confuses folks. The kerf is the material that turns into sawdust when you cut it. The saw blade has thickness. Usually, it’s about 1/8th of an inch.
Imagine you mark a board at 10 inches. If you cut right down the middle of your line, you are removing 1/8th of an inch of wood from the center. Now your 10-inch board is 9 and 15/16ths. It’s too short.
You always have to cut on the “waste side” of the line. You want the blade to graze the line, leaving your measured piece perfectly intact while the kerf comes out of the scrap wood. It requires a steady hand and a good eye. This is why using a quality miter saw or circular saw is vital, but even more important is knowing where that blade is going to land.
Essential Tools for the Chandler Homeowner
If you are looking to do some light repairs around the house, you don’t need a truck full of gear. However, having a few decent tools makes a massive difference. Here is a breakdown of what helps us keep things straight versus what you might find in a basic drawer.
| Tool | Basic Version | The “Pro” Upgrade | Why It Matters |
|---|---|---|---|
| Tape Measure | Flimsy, bends at 3 feet | 25ft FatMax or similar | Stiffness allows you to reach across a room without the tape collapsing. |
| Square | Plastic school ruler | Speed Square (Rafter Square) | essential for marking 90 and 45-degree angles quickly on 2x4s. |
| Level | A phone app | 2-foot or 4-foot box beam level | Phone apps are okay for pictures, but you need a real level for shelves or cabinets. |
| Hammer | rusted generic hammer | 16oz smooth-face claw hammer | Balance reduces fatigue; smooth face prevents marring the wood if you miss. |
Coping vs. Mitering: The Secret to Perfect Corners
You walk into a room and look at the baseboards. The corners look tight, seamless. You assume the carpenter just cut two 45-degree angles and stuck them together, right?
Well, sometimes. But walls are rarely perfectly square. In fact, I don’t think I’ve ever seen a perfectly 90-degree corner in a house in Chandler. If you cut two perfect 45s and put them in a corner that is actually 88 degrees, you get a gap.
The Coping Saw Method
For inside corners, we often use a technique called coping. This is where you cut one board flat against the wall, and then you cut the profile of the second board to fit over the first one like a puzzle piece.
It sounds complicated—and honestly, it takes some practice—but it allows the joint to stay tight even if the walls aren’t square. Plus, when that wood shrinks a little bit in the Arizona dry heat (there it is again), a coped joint hides the movement much better than a mitered joint. It’s these little details that separate a quick DIY fix from a professional carpentry job.
Level, Plumb, and Square
These three words are the holy trinity of construction.
- Level: Horizontal straightness (side to side).
- Plumb: Vertical straightness (up and down).
- Square: A perfect 90-degree angle.
You can have a shelf that is level, but if the brackets aren’t plumb, it looks weird. You can have a door frame that is square, but if it isn’t plumb, the door will swing open on its own. Ghost doors are usually just a sign of bad carpentry, not a haunting.
Checking for plumb is something many people forget. When we install a door, we spend more time shimming the frame to get it perfectly vertical than we do actually screwing it in. Shims are those little wedge-shaped pieces of wood. They are your best friend. They allow you to make micro-adjustments to force a piece of wood into the perfect position before you fasten it permanently.
The “Scribe” – Fitting Wood to Weird Shapes
Here is a scenario: You want to install a countertop or a built-in desk against a wall. But the wall is wavy. It bows out in the middle. If you push your straight board against the wall, you have huge gaps on the ends. Caulk can only hide so much, you know?
This is where scribing comes in. You hold the board near the wall, take a compass (like from high school math class), and run the metal point along the wall while the pencil draws on your board. The pencil transfers the exact waviness of the wall onto your wood. Then, you use a jigsaw to cut along that line.
The result? The wood fits against the jagged, wavy wall perfectly. It looks like the wood grew there. It’s one of those techniques that makes people go, “Wow, how did you do that?” It’s not magic; it’s just geometry and patience.
When to DIY and When to Call for Help
Look, I love it when homeowners take pride in their houses. Fixing a loose fence slat or tightening a cabinet hinge is great. But certain projects require a level of precision that can be incredibly frustrating if you don’t do it every day.
Crown molding is the classic example. It requires cutting compound angles—meaning the saw is tilted and turned at the same time. You have to cut it upside down and backward. It’s a mental gymnastics routine that defeats even brave DIYers. You end up with a pile of expensive scrap wood and a headache.
Hanging doors is another one. It looks easy on YouTube, but getting the reveal (the gap around the door) consistent so it doesn’t rub or stick takes a lot of fine-tuning.
Why Precision Saves Money
It might seem cheaper to slap something together quickly, but inaccurate carpentry costs more in the long run.
- Wasted Material: Cutting a board too short means buying a new board. With lumber prices these days, that hurts.
- Energy Bills: Gaps around doors and windows let that precious air conditioning escape. In Chandler, we need to keep every bit of cool air inside.
- Redoing Work: Fixing a shelf that fell down because it wasn’t anchored into the studs properly takes twice as long as doing it right the first time.
We take pride in getting it right. We treat your home like it’s our own. We check the angles, we account for the dry air, and we measure three times if we have to. It’s not just about getting the job done; it’s about the satisfaction of seeing a line that is perfectly straight and a joint that is perfectly tight.
Let Us Handle the Hard Stuff
If you are looking at a project and feeling overwhelmed by the angles, the measurements, or just the sheer lack of time, don’t stress yourself out. Whether it’s repairing a deck, installing new baseboards, or fixing a door that just won’t close right, we have the tools and the experience to handle it.
You deserve a home that looks sharp and functions perfectly. Let us take care of the precision work so you can just enjoy the results.
Give East Valley Handyman a call today.
Phone: 480-500-6935
Request a Free Quote

