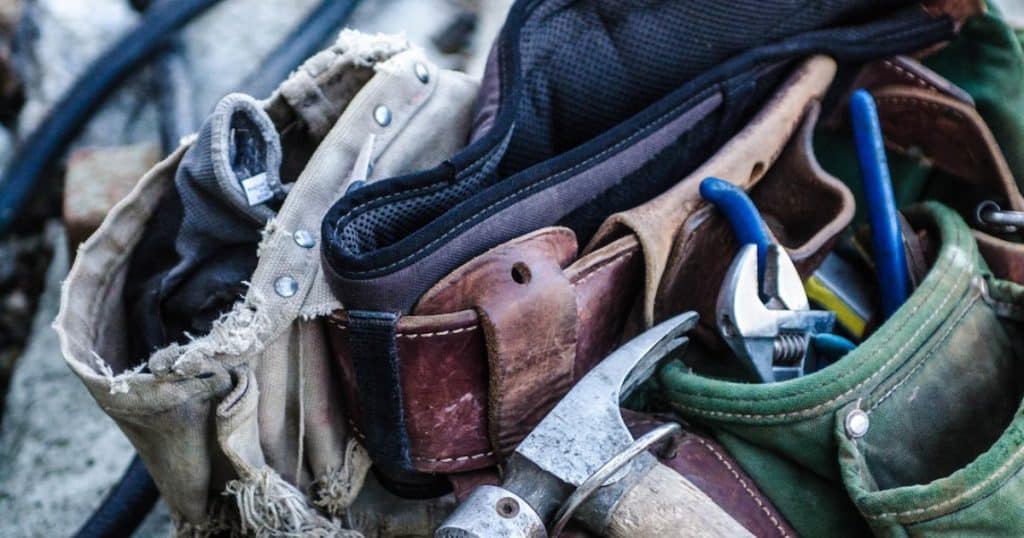
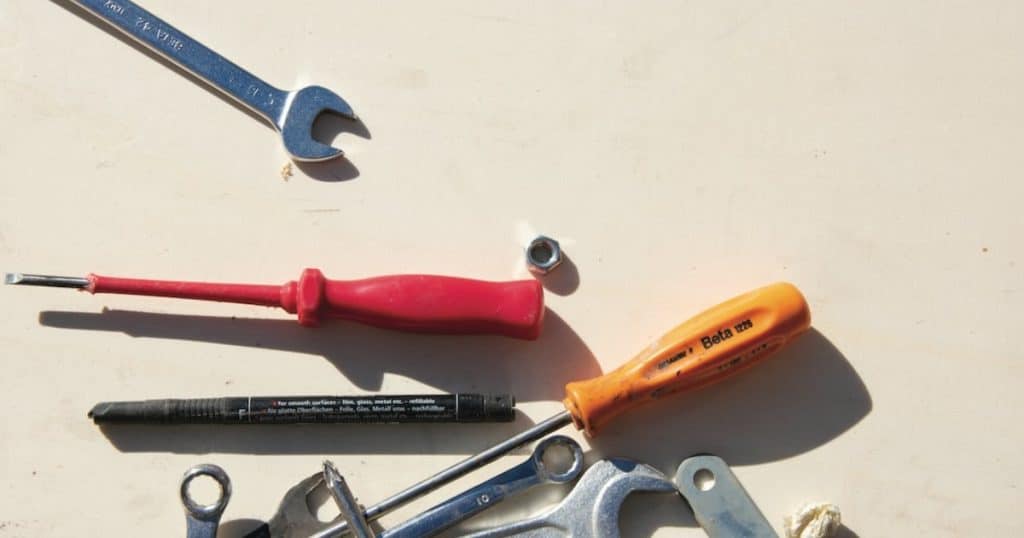
Author: Dylan Smith

DIY Disasters to Avoid: Tips from a Pro Handyman

Get the Job Done Right: The Benefits of Hiring a Professional Handyman

Are you eager to roll up your sleeves and tackle some DIY projects around the house? While the idea of saving money and adding a personal touch to your home is exciting, DIY can quickly turn into a disaster if you’re not careful. As a professional handyman from East Valley Handyman, I’ve seen my fair share of DIY mishaps, and I’m here to share some essential tips to help you avoid them.

The Importance of DIY Safety

Before we dive into specific DIY disasters to avoid, let’s talk about the most crucial aspect: safety. Your well-being should always come first. Wear appropriate safety gear like gloves, safety glasses, and a dust mask when needed. Keep your workspace well-ventilated, and if a project seems too risky or beyond your skill level, don’t hesitate to call a professional.

1. Ignoring Proper Planning

One of the most common mistakes DIY enthusiasts make is skipping the planning phase. Rushing into a project without a well-thought-out plan can lead to costly errors and wasted time. Take the time to research, gather materials, and create a step-by-step plan for your project.

2. Underestimating Time and Budget

DIY projects often take longer and cost more than expected. It’s crucial to set a realistic budget and timeline. Research the costs of materials and factor in extra time for unexpected delays. Having a buffer in both time and money will save you from frustration down the road.

3. Neglecting Proper Tools

Using the right tools for the job is essential for a successful DIY project. Don’t cut corners by using makeshift tools or trying to make do with what you have. Invest in quality tools, and make sure you know how to use them correctly. It’s a wise investment that will pay off in the long run.

4. Skipping Surface Preparation

Proper surface preparation is the foundation of a successful project. Whether you’re painting a room, installing tile, or working on woodworking projects, take the time to sand, clean, and prime surfaces as needed. Skipping this step can lead to paint peeling, tiles coming loose, or finishes not adhering properly.

5. Rushing Through Measurements

The old saying “measure twice, cut once” holds true in DIY. Accurate measurements are crucial, whether you’re cutting materials, installing fixtures, or building furniture. Double-check your measurements to avoid costly mistakes and wasted materials.

6. Overlooking Permits and Regulations

Before starting a major DIY project, check if you need permits or if there are local regulations you must follow. Ignoring these requirements can lead to fines, project delays, or even having to redo the work.

7. Ignoring Safety Precautions

Safety should always be a top priority. Follow safety instructions for tools and equipment, and take precautions like turning off the power when working with electricity. Be cautious when using ladders and follow best practices for ladder safety.

8. Overcomplicating Projects

Sometimes, DIYers attempt overly complex projects without the necessary experience. Start with simpler tasks and gradually build your skills. Taking on too much too soon can lead to frustration and unfinished projects.

9. Forgetting to Test Before Assembly

When assembling furniture or DIY kits, it’s easy to skip the step of testing components before final assembly. Always check that all parts fit correctly and function as intended before proceeding. This prevents you from having to disassemble and troubleshoot later.

10. Neglecting Maintenance

After completing a DIY project, don’t forget about maintenance. Regularly inspect and maintain the work you’ve done to ensure it stays in good condition. Neglecting maintenance can lead to more significant issues down the road.

Conclusion

Embarking on DIY projects can be a rewarding experience, but it’s essential to approach them with caution and preparation. By avoiding these common DIY disasters and following safety guidelines, you’ll be well on your way to successful and satisfying home improvement projects.

Remember, if you ever find yourself in over your head or need professional assistance, East Valley Handyman is just a call away at 480-500-6935. We’re here to help you with your home maintenance and improvement needs. Happy DIYing!

Home Maintenance Hacks: Your Handyman’s Secret Toolbox

Welcome to East Valley Handyman’s guide on Home Maintenance Hacks! We understand that maintaining your home can be a daunting task, but fear not; we’re here to equip you with the knowledge and tools to make it easier than ever before. In this comprehensive article, we’ll cover everything from assembling your essential toolkit to tackling common home maintenance issues like a pro.

So, let’s dive in and unlock the secrets of home maintenance success!

The Essential Toolkit

Tools Every Homeowner Should Have

When it comes to home maintenance, having the right tools at your disposal is half the battle. Here are some must-haves for every homeowner’s toolbox:

  • Screwdriver Set: A versatile tool for tightening loose screws on door handles or cabinets.
  • Adjustable Wrench: Perfect for plumbing repairs and tightening bolts.
  • Hammer: An essential tool for hanging pictures, assembling furniture, and minor carpentry work.
  • Tape Measure: Accurate measurements are crucial for various DIY projects.
  • Utility Knife: Handy for cutting materials like cardboard, carpet, or even opening packages.
  • Pliers: Ideal for gripping, bending, and cutting wires.
  • Level: Ensures your shelves, pictures, and fixtures are perfectly straight.
  • Safety Gear: Don’t forget safety glasses, gloves, and a dust mask to protect yourself during projects.

How to Choose the Right Tools

Choosing the right tools can make a world of difference in your home maintenance endeavors. At East Valley Handyman, we recommend investing in high-quality, durable tools that will last for years. When shopping for tools, consider factors like ergonomics, grip comfort, and warranty coverage.

Remember, the right tools not only make tasks easier but also ensure safety and precision in your projects.

DIY Home Maintenance Tips

Fixing Common Plumbing Issues

Plumbing problems can cause headaches, but some can be resolved without calling a professional. Here’s how:

  • Leaky Faucets: Replace worn-out washers or O-rings to stop annoying drips.
  • Clogged Drains: Use a drain snake or plunger to clear blockages.
  • Running Toilets: Adjust or replace the flapper valve to stop water wastage.

Electrical Repairs Made Easy

Electrical issues should be handled with care, but you can tackle some minor problems yourself:

  • Replacing Outlets or Switches: Turn off power at the breaker, then carefully replace the component.
  • Replacing Light Fixtures: Follow the manufacturer’s instructions, and always turn off the power.

Tackling Minor Carpentry Projects

Don’t shy away from small carpentry projects; with the right tools and knowledge, you can accomplish wonders:

  • Repairing Squeaky Floors: Drive screws into the subfloor near the squeak to secure it.
  • Fixing Loose Cabinet Handles: Tighten screws or replace them with longer ones if necessary.

Seasonal Maintenance Checklist

Spring Cleaning and Repairs

As the seasons change, your home needs attention too. Here’s your spring maintenance checklist:

  • Gutter Cleaning: Clear out debris to ensure proper drainage.
  • Inspect Roof: Look for damaged shingles or signs of wear.
  • HVAC Maintenance: Change filters, clean vents, and schedule professional servicing.

Preparing for the Winter Months

Winter can be harsh on your home, so it’s crucial to prepare adequately:

  • Weatherstripping: Seal gaps around doors and windows to prevent heat loss.
  • Insulate Pipes: Prevent freezing by insulating exposed pipes.
  • Check Heating System: Ensure your heating system is in top shape before the cold sets in.

Frequently Asked Questions

Q1: Can I handle home maintenance on my own?

Absolutely! Many tasks can be DIYed with the right tools and guidance. However, for complex issues or when in doubt, it’s best to consult professionals like East Valley Handyman.

Q2: How often should I inspect my home?

Regular inspections are crucial. Conduct monthly checks for small issues and perform seasonal maintenance to keep your home in top condition.

Q3: What’s the best way to prevent mold and mildew?

Proper ventilation, regular cleaning, and addressing leaks promptly are key to preventing mold and mildew in your home.

Q4: When should I call a handyman?

Call a handyman when you encounter tasks beyond your expertise or when safety is a concern. East Valley Handyman is just a call away at 480-500-6935.

Q5: Can you help me with larger home improvement projects?

Absolutely! East Valley Handyman specializes in both small repairs and large home improvement projects. Visit our website to learn more.

Conclusion

Congratulations! You now have a handyman’s secret toolbox at your disposal. Armed with the right tools, knowledge, and the support of East Valley Handyman, you can tackle home maintenance tasks like a pro.

Whether it’s a quick fix or a major project, remember that East Valley Handyman is here to help. Reach out to us at 480-500-6935 or visit our website to request our services.

Now, go forth and keep your home in tip-top shape!

Creating Custom Solutions: Tailoring Handyman Services to Your Needs

At East Valley Handyman, we understand that every home is unique, and so are its repair and maintenance needs. That’s why we take pride in offering custom solutions that are tailored to your specific requirements. In this blog post, we’ll explore how our approach to handyman services sets us apart and how we can address your household issues with precision and care.

Understanding Your Needs

When it comes to fixing issues around your home, a one-size-fits-all approach simply doesn’t cut it. What sets us apart at East Valley Handyman is our commitment to understanding your needs before we even pick up a tool. We start by listening to your concerns and assessing the problem areas in your home.

Whether you’re dealing with a leaky faucet, a broken door, or a wall in need of patching, our team takes the time to understand the unique characteristics of your home and the specific challenges you’re facing.

Customizing Solutions

Once we’ve gained a clear understanding of your needs, we get to work on crafting a customized solution. Our skilled and experienced handyman professionals don’t just apply generic fixes; instead, they draw from their expertise to develop solutions that are tailored to your situation.

For example, if you’re dealing with a squeaky floor, we’ll identify the root cause of the squeak and apply the right technique to eliminate it. If you have a leaky faucet, we won’t just stop at fixing the leak – we’ll also check for any underlying issues that might be contributing to the problem.

Quality Workmanship

Our commitment to providing custom solutions doesn’t mean we compromise on quality. In fact, it’s quite the opposite. We believe that the best solutions are a combination of careful analysis, expert craftsmanship, and high-quality materials.

When you choose East Valley Handyman, you’re choosing a team that takes pride in delivering work of the highest quality. We ensure that every repair, installation, or maintenance task is executed with precision, attention to detail, and a dedication to ensuring your complete satisfaction.

Transparency and Communication

We understand that inviting professionals into your home for repairs can be a daunting experience. That’s why we prioritize transparency and communication throughout the process. From the initial assessment to the completion of the job, we keep you informed about our findings, the recommended solutions, and the progress of the work.

We believe that open communication helps build trust and ensures that you’re always aware of what’s happening with your home repairs.

Going Beyond Repairs

At East Valley Handyman, our commitment to custom solutions extends beyond just repairs. We offer a range of services designed to enhance the functionality, aesthetics, and comfort of your home. Whether you’re looking to update your kitchen, remodel your bathroom, or tackle a larger home improvement project, our team is equipped to handle it all.

Your Trusted Partner

In a world where convenience often comes at the expense of personalized service, we’re proud to be your trusted partner in home maintenance and repairs. Our dedication to understanding your needs, crafting tailored solutions, and delivering exceptional work sets us apart as a handyman service that truly cares.

Contact Us

Ready to experience the difference of custom solutions from East Valley Handyman? Give us a call today at 480-500-6935, and let’s discuss how we can address your specific household needs. You can also reach out to us through our online contact form, and one of our friendly team members will get back to you promptly.

Remember, when it comes to your home, you deserve solutions that are as unique as you are. Choose East Valley Handyman for custom, quality, and care.

Handyman Hacks: Quick Fixes for Common Household Issues

Welcome to our comprehensive guide on tackling common household issues like a pro! At East Valley Handyman, we understand that little problems around the house can sometimes turn into big headaches. That’s why we’ve put together these handyman hacks to help you quickly and efficiently address these issues on your own. From unclogging drains to repairing leaky faucets, we’ve got you covered.

Unclogging Drains: DIY Solutions

We’ve all been there – a slow-draining sink or bathtub that’s just plain annoying. Before you reach for those chemical drain cleaners, consider a more eco-friendly and effective approach. Mix equal parts of baking soda and vinegar and pour it down the drain. Cover the drain with a cloth and let the mixture work its magic for about 15 minutes. Then, flush it out with hot water.

For tougher clogs, a drain snake can be a real lifesaver. Insert it into the drain and twist it to break up the clog. Remember to wear gloves and work gently to avoid damaging your pipes.

Patching Up Wall Holes Like a Pro

Don’t let unsightly wall holes ruin the aesthetics of your home. Whether it’s from a doorknob hitting the wall or an old nail hole, patching it up is easier than you might think. Start by cleaning the hole and surrounding area. Then, fill the hole with spackling compound using a putty knife. Allow it to dry, and once dry, sand it down until smooth. A fresh coat of paint, and your walls will look good as new!

Dealing with Squeaky Doors and Floors

Squeaky doors and floors can drive anyone crazy. Luckily, the solution is simple. Grab some powdered graphite or silicone spray and apply it to the hinges of your doors. For squeaky floors, sprinkle some talcum powder or powdered graphite between the floorboards and rub it in with a cloth. No more annoying squeaks!

Repairing Leaky Faucets: A Step-by-Step Guide

That persistent dripping sound from a leaky faucet can be both irritating and wasteful. Before you call in a plumber, try fixing it yourself. Start by turning off the water supply to the faucet. Remove the handle and the nut underneath. Replace the worn-out rubber washer inside and reassemble the faucet. Turn the water supply back on, and voila! No more leaks.

Fixing Electrical Outlets Safely

If you’re comfortable working with electricity, fixing a faulty outlet can be a breeze. Start by turning off the circuit breaker to ensure your safety. Remove the outlet cover and check the wiring. If everything seems fine, the issue might be a worn-out outlet. Replace it with a new one by following the manufacturer’s instructions. Always remember to exercise caution when working with electrical components.

Frequently Asked Questions (FAQ)

How do I find the right tools for these fixes?

We recommend having a basic toolkit at home, including a screwdriver set, pliers, a wrench, a putty knife, and a drain snake. These tools will cover most of the common household repairs.

When should I call a professional handyman?

If you’re unsure about the issue or lack the necessary skills and tools, it’s best to call in a professional handyman. Attempting complex repairs without experience could lead to more damage.

Are there any safety precautions I should take?

Absolutely! When working with tools or electricity, wear appropriate safety gear like gloves and safety glasses. Turn off electricity before attempting any electrical repairs.

Can I use household items for these repairs?

Definitely! Many DIY fixes can be accomplished using items you already have at home, like vinegar, baking soda, and powdered graphite. They’re effective and eco-friendly solutions.

What’s the average cost of hiring a handyman?

The cost can vary depending on the complexity of the repair and your location. To get an accurate estimate, give us a call at East Valley Handyman at 480-500-6935, or you can fill out our online form here.

Conclusion

We hope these handyman hacks empower you to tackle common household issues with confidence. Remember, a little effort can go a long way in maintaining the functionality and beauty of your home. If you ever find yourself needing expert assistance, East Valley Handyman is just a call or click away. Reach out to us at 480-500-6935 or visit our website at eastvalleyhandyman.com to request our professional services. Happy repairing!

The Art of Tile Installation: Handyman Secrets for a Flawless Look

Welcome to our ultimate guide on “The Art of Tile Installation: Handyman Secrets for a Flawless Look.” At East Valley Handyman, we take pride in our expertise in tile installation, and we are excited to share our knowledge to help you achieve a stunning and flawless tile project for your home. Whether you’re considering a bathroom makeover or updating your kitchen backsplash, proper tile installation is key to achieving a beautiful and durable finish. In this blog post, we will unravel the secrets of tile installation and empower you to create a space that reflects your style and personality.

Step 2: The Importance of Professional Tile Installation

Tile installation may seem like a simple task, but it requires precision and skill to ensure a flawless outcome. Hiring a professional handyman, like the ones at East Valley Handyman, can make a significant difference in the success of your tile project. Our experienced handymen have the expertise and tools to handle different types of tiles and surfaces, ensuring a seamless and visually appealing installation. With professional help, you can avoid costly mistakes and enjoy the peace of mind that comes with a job well done.

Step 3: Choosing the Right Tiles for Your Project

Material and Durability

Selecting the right tile material is essential for long-lasting results. Ceramic and porcelain tiles are popular choices for their durability and versatility. Natural stone tiles, like marble and travertine, offer a luxurious and timeless appeal. Consider the location of your project and the tile’s exposure to moisture, wear, and tear to make the best material choice.

Size and Shape

Tiles come in various sizes and shapes, from classic squares and rectangles to trendy hexagons and mosaics. Larger tiles can create an illusion of space in smaller rooms, while smaller tiles offer intricate designs and patterns. Choose a size and shape that complements your overall design vision.

Color and Design

The color and design of your tiles play a significant role in the aesthetic appeal of your space. Light-colored tiles can make a room feel more spacious and airy, while bold colors add character and drama. Experiment with different tile patterns, such as herringbone or basketweave, to create unique looks.

Step 4: Preparing for Tile Installation

Surface Preparation

Proper surface preparation is crucial for a successful tile installation. Ensure that the surface is clean, dry, and level. Remove any existing flooring or debris and repair any cracks or imperfections before starting the installation process.

Gathering the Right Tools and Materials

Having the right tools and materials on hand will streamline the installation process. You’ll need essentials like a notched trowel, tile spacers, a tile cutter, and a rubber float for grouting. Invest in high-quality tools for professional-looking results.

Step 5: Step-by-Step Tile Installation Guide

Marking Layout and Setting Guidelines

Before applying adhesive, plan the layout of your tiles. Use a chalk line or a straightedge to create guidelines for precise alignment. Dry-lay the tiles first to ensure a perfect fit and make any adjustments as needed.

Applying Mortar or Adhesive

Apply thin-set mortar or adhesive on the surface using the notched trowel. Work in small sections to prevent the adhesive from drying out before placing the tiles. Press each tile firmly into the mortar, using the tile spacers to maintain even gaps.

Placing the Tiles

Carefully lay the tiles following the marked guidelines. Avoid sliding the tiles into place, as it may disturb the adhesive. Check for level and evenness as you go along.

Cutting Tiles for Edges and Corners

Measure and mark tiles that need to be cut to fit the edges and corners. Use a tile cutter or a wet saw to make precise cuts. Take your time to ensure accurate measurements and cuts for a professional finish.

Grouting and Finishing Touches

Once the adhesive has set, remove the tile spacers and prepare for grouting. Choose the appropriate grout color and mix it according to the manufacturer’s instructions. Apply the grout using a rubber float, pressing it into the gaps between tiles. Wipe off excess grout with a damp sponge, and buff the tiles for a clean look.

Step 6: Common Tile Installation Mistakes to Avoid

  • Not properly preparing the surface before installation.
  • Using the wrong adhesive or mortar for the tile material.
  • Incorrectly measuring and cutting tiles, leading to uneven edges and gaps.
  • Rushing through the grouting process, resulting in uneven grout lines and a messy appearance.

Step 7: Tile Maintenance Tips for Longevity

  • Regularly clean your tiles with mild, non-abrasive cleaners to maintain their luster.
  • Use rugs or mats in high-traffic areas to protect tiles from wear.
  • Promptly address any stains or spills to prevent permanent discoloration.
  • Seal natural stone tiles to protect them from moisture and stains.

Step 8: FAQ (Frequently Asked Questions)

Can I install tiles myself, or should I hire a professional?

While DIY tile installation is possible, it requires skill and patience to achieve professional results. Hiring a skilled handyman from East Valley Handyman ensures a flawless and efficient installation.

How long does tile installation typically take?

The duration of tile installation depends on the size and complexity of the project. Our experienced handymen work efficiently to minimize disruption and complete the job promptly.

What type of grout should I use for my tiles?

The type of grout you use depends on the tile material and the width of the grout lines. Our experts can help you choose the right grout for your specific project.

Can I install tiles over existing flooring?

In some cases, you can install tiles over existing flooring, but proper preparation and evaluation of the current surface are crucial. Our professionals can assess the feasibility of this option for your project.

How do I clean and maintain my tiles after installation?

Regularly sweep or vacuum your tiles to remove dirt and debris. Use a damp mop with a mild cleaner for routine cleaning, and address any stains or spills promptly.

At East Valley Handyman, we understand the intricacies of tile installation and are committed to delivering outstanding results. For a flawless and visually stunning tile project, call us at 480-500-6935 or visit our website at eastvalleyhandyman.com to schedule a consultation.

Keeping Up with Home Maintenance: Handyman Schedules for Every Season

Step 1: Introduction

Welcome to our comprehensive guide on “Keeping Up with Home Maintenance: Handyman Schedules for Every Season.” At East Valley Handyman, we believe that maintaining your home throughout the year is essential to keep it in tip-top shape, prevent costly repairs, and ensure a comfortable living space for you and your family. In this blog post, we will share valuable home maintenance tips for each season, empowering you to tackle seasonal tasks efficiently and effectively.

Step 2: Informative Blog Post on Home Maintenance

Spring Home Maintenance Tips

Cleaning Gutters and Downspouts

As the winter season bids adieu, it’s time to prepare your home for spring showers. Clearing out debris from gutters and downspouts is crucial to prevent water damage and potential flooding. Clogged gutters can lead to water seepage into your home’s foundation, causing structural issues. Regularly inspect and clean the gutters to keep water flowing freely.

Checking for Roof Damage

The winter elements can take a toll on your roof, so inspecting it for any signs of damage is vital. Look for loose or missing shingles, cracks, or leaks. Timely repairs can extend your roof’s lifespan and prevent water from seeping into your home, ensuring a dry and safe living environment.

Inspecting Windows and Doors

Ensure that your windows and doors are adequately sealed and functioning correctly. Replace worn weatherstripping to improve energy efficiency and keep your home comfortable. Inspect the caulking around windows and doors and reseal if necessary, as it helps to keep out drafts and water.

Summer Home Maintenance Tips

A/C Unit Inspection and Maintenance

With summer’s scorching heat, your air conditioning system becomes your best friend. Schedule a professional inspection to ensure it’s running efficiently. Clean or replace filters regularly to maintain good indoor air quality and optimize cooling performance.

Deck and Patio Maintenance

Enjoy outdoor activities during summer by sprucing up your deck and patio. Inspect for any signs of rot or loose boards, and refinish or seal the surface to protect it from the sun and moisture.

Exterior Painting

A fresh coat of paint can do wonders for your home’s curb appeal. Summer is the perfect time to give your exterior walls a new look. Choose high-quality paint that withstands the elements and enhances your home’s appearance.

Fall Home Maintenance Tips

Lawn Care and Leaf Removal

As the leaves begin to fall, keep your lawn free from debris. Rake and dispose of leaves properly to avoid potential pest and mold issues. Also, aerate and fertilize your lawn to prepare it for the upcoming winter months.

Heating System Inspection

Before the chilly weather sets in, have your heating system checked by a professional. A well-maintained heating system ensures a warm and cozy home during the cold months.

Weatherstripping Doors and Windows

To conserve energy and prevent drafts, check and replace weatherstripping around doors and windows. Properly sealed openings will help keep your home comfortable and reduce energy bills.

Winter Home Maintenance Tips

Winterizing Pipes

Frozen pipes can lead to costly water damage. Insulate exposed pipes and disconnect outdoor hoses before winter arrives. Let faucets drip during extreme cold to prevent freezing.

Fireplace and Chimney Maintenance

If you have a fireplace, ensure it’s clean and safe to use. Have your chimney inspected and cleaned annually to avoid chimney fires and harmful fumes.

Insulating Attics and Basements

Proper insulation in attics and basements keeps your home warm and prevents heat loss. Check for any gaps or weak spots in the insulation and add more if needed.

FAQ (Frequently Asked Questions)

How often should I schedule home maintenance?

At East Valley Handyman, we recommend scheduling home maintenance tasks seasonally. Each season comes with unique challenges, and regular upkeep can prevent more significant issues down the road.

Can I do home maintenance tasks myself, or should I hire a professional?

While some tasks can be DIY projects, others require professional expertise. Our team of skilled handymen at East Valley Handyman can handle various maintenance tasks efficiently, ensuring quality results.

Why is seasonal home maintenance important?

Seasonal home maintenance helps identify and address potential issues early, saving you from costly repairs in the future. It also enhances the longevity and value of your property.

How much does typical home maintenance cost?

The cost of home maintenance varies based on the tasks involved and the size of your property. At East Valley Handyman, we offer competitive pricing and transparent quotes for our services.

Should I prioritize specific tasks based on the season?

Absolutely! Prioritize tasks that are most relevant to the current season. For example, focus on A/C maintenance in summer and pipe insulation in winter. This approach ensures you stay ahead of potential problems.

Remember, regular home maintenance is a wise investment that pays off in the long run. At East Valley Handyman, we’re here to help you keep your home in top-notch condition throughout the year. For expert assistance, call us at 480-500-6935 or visit our website at eastvalleyhandyman.com to request our services.

How to Build a Deck: A Handyman’s Guide

Introduction

Welcome to East Valley Handyman’s guide on how to build a deck! If you’re looking to enhance your outdoor living space and add value to your home, building a deck is a fantastic idea. In this comprehensive guide, we’ll walk you through the process, from planning and designing your deck to the finishing touches. So grab your tools and let’s get started!

1. Planning and Designing Your Deck

Before you start hammering nails, it’s essential to plan and design your deck properly. Consider factors such as the deck’s size, shape, location, and the purpose it will serve. Take measurements, sketch out your design, and obtain any necessary permits. Our experts at East Valley Handyman can assist you in creating a deck design that perfectly matches your vision.

2. Gathering Materials and Tools

Once you have your deck design in place, it’s time to gather the materials and tools you’ll need. Common materials include pressure-treated lumber, deck screws, joist hangers, concrete footings, and post anchors. Remember to choose high-quality materials for durability and longevity. As for tools, you’ll require a circular saw, drill, level, tape measure, and more. Don’t forget to wear appropriate safety gear throughout the construction process.

3. Preparing the Site

Preparing the site is crucial for ensuring a stable and long-lasting deck. Start by clearing the area of any vegetation, rocks, or debris. Then, mark the deck’s perimeter using stakes and string, ensuring it is level. Dig holes for the footings and install them according to local building codes. Proper site preparation sets the foundation for a solid deck structure.

4. Building the Deck Frame

With the site prepared, it’s time to construct the deck frame. Begin by attaching ledger boards to your house’s exterior, ensuring they are securely fastened. Next, install the support beams and joists, following your design’s specifications. Double-check the level and spacing as you go. Building a sturdy frame is vital for the deck’s structural integrity.

5. Installing Decking Boards

Now comes the exciting part—installing the decking boards that will create the surface of your deck. Opt for wood or composite boards, considering factors like aesthetics, maintenance, and budget. Begin installation at one end, securing each board with deck screws or hidden fasteners. Maintain consistent spacing between boards for a professional look.

6. Adding Railings and Balusters

Railings and balusters not only provide safety but also contribute to the deck’s visual appeal. Check your local building codes for height and spacing requirements. Install posts, attach the top and bottom rails, and insert balusters or spindles between them. Consider using decorative elements to add a personal touch to your deck design.

7. Applying Finishes and Stains

To protect your deck from the elements and enhance its appearance, applying finishes and stains is essential. Choose a high-quality deck sealer or stain that suits your desired look. Clean the deck thoroughly before application and follow the manufacturer’s instructions. Regularly maintaining the finish will ensure your deck remains beautiful and protected for years to come.

8. Deck Maintenance Tips

Proper maintenance is crucial for the longevity of your deck. Here are some essential tips to keep in mind:

  • Regularly clean your deck by sweeping away debris and washing with a mild detergent.
  • Inspect for any signs of damage or wear, such as loose boards or rusted fasteners.
  • Reapply a protective finish every few years to maintain the deck’s appearance and protect it from the elements.
  • Avoid using sharp objects or abrasive cleaners that could damage the deck’s surface.

FAQ Section

Q1: Do I need a permit to build a deck? A1: The need for a permit varies depending on your location and the size of the deck. Contact your local building department to determine the specific requirements for your area.

Q2: How long does it take to build a deck? A2: The time required to build a deck depends on its size, complexity, and your experience level. It can range from a few days to a couple of weeks.

Q3: Can I build a deck myself, or should I hire a professional? A3: Building a deck yourself is possible if you have the necessary skills and knowledge. However, hiring a professional like East Valley Handyman ensures a high-quality result and saves you time and effort.

Q4: What is the best decking material? A4: The best decking material depends on your preferences, budget, and desired maintenance level. Common options include pressure-treated wood, composite decking, and tropical hardwoods.

Q5: How much does it cost to build a deck? A5: The cost of building a deck varies widely based on factors such as size, materials used, design complexity, and labor costs. It’s best to request a quote from East Valley Handyman to get an accurate estimate for your specific project.

Conclusion

Building a deck is an exciting project that can transform your outdoor space into a beautiful and functional area for relaxation and entertainment. By following the steps outlined in this handyman’s guide, you’ll be well-equipped to take on the task with confidence. If you need professional assistance or have any questions, don’t hesitate to reach out to East Valley Handyman at 480-500-6935 or visit our website at www.example.com to request our services. Let’s create the deck of your dreams together!


Quick and Easy Fixes for Common Household Problems

Introduction

Welcome to the East Valley Handyman blog, where we provide practical solutions to your common household problems. In this article, we’ll share some quick and easy fixes for the issues you may encounter in your home. From plumbing and electrical problems to appliance malfunctions, we’ve got you covered. Follow our expert tips and tricks to save time and money on repairs. Let’s dive in!

Quick and Easy Fixes for Plumbing Issues

When it comes to plumbing problems, a small issue can quickly turn into a major headache. Here are some common plumbing problems and their quick fixes:

1. Leaky Pipes

Leaky pipes can waste water, damage your home, and increase your utility bills. To fix a leaky pipe, follow these steps:

  • Locate the leak and turn off the water supply.
  • Clean the affected area and dry it thoroughly.
  • Apply plumber’s tape or pipe sealant to the leak.
  • Tighten the fitting or replace it if necessary.

2. Clogged Toilets

A clogged toilet can disrupt your daily routine. Here’s how you can tackle this issue:

  • Use a plunger to create suction and dislodge the clog.
  • If the plunger doesn’t work, try using a toilet auger to remove the obstruction.
  • Avoid using chemical drain cleaners, as they can damage your plumbing system.

3. Dripping Faucets

The constant dripping of a faucet can be annoying and wasteful. To fix a dripping faucet:

  • Turn off the water supply to the faucet.
  • Remove the handle and replace the worn-out washer or O-ring.
  • Reassemble the faucet and turn on the water to check for leaks.

Simple Solutions for Electrical Problems

Electrical problems can be dangerous and should be handled with caution. However, there are a few quick fixes you can try before calling a professional:

1. Tripped Circuit Breaker

If you experience a sudden loss of power in a part of your home, it could be due to a tripped circuit breaker. Follow these steps to reset it:

  • Locate your electrical panel and identify the tripped breaker (the switch in the middle or off position).
  • Flip the breaker to the “off” position and then back to the “on” position.
  • If the breaker trips again immediately or frequently, contact a qualified electrician.

2. Non-Functional Outlets

If an outlet stops working, it may be due to a tripped GFCI (Ground Fault Circuit Interrupter). Try the following:

  • Locate the GFCI outlet in your home, usually found in bathrooms, kitchens, or outdoor areas.
  • Press the “reset” button on the outlet.
  • If the outlet still doesn’t work, check the circuit breaker and contact an electrician if needed.

Effective Tips for Dealing with Appliance Malfunctions

Appliance malfunctions can disrupt your daily routine and cause inconvenience. Here are some quick and easy fixes for common appliance problems:

1. Refrigerator Not Cooling

If your refrigerator fails to keep your food cold, try these troubleshooting steps:

  • Check the temperature settings and adjust them if needed.
  • Clean the condenser coils at the back of the refrigerator to improve airflow.
  • Ensure that the door seals are intact and free from debris.

2. Washing Machine Won’t Drain

If your washing machine refuses to drain, follow these steps:

  • Check for any obstructions in the drain hose or pump filter.
  • Ensure that the drain hose is properly connected and not kinked.
  • If the issue persists, call a professional appliance repair service.

Common Solutions for Clogged Drains

Clogged drains can be a nuisance, but you don’t always need to call a plumber. Try these DIY fixes before reaching for the phone:

  • Use a plunger to dislodge the clog by creating a strong seal around the drain.
  • Pour boiling water down the drain to dissolve grease and soap buildup.
  • Use a drain snake to remove hair and debris that may be causing the blockage.

DIY Tricks for Fixing Leaky Faucets

A leaky faucet not only wastes water but can also drive up your water bill. Here’s how you can fix it yourself:

  • Turn off the water supply to the faucet.
  • Disassemble the faucet and replace the worn-out washer or cartridge.
  • Reassemble the faucet and turn on the water to check for leaks.

Frequently Asked Questions (FAQ)

How can I unclog a stubborn drain?

To unclog a stubborn drain, try using a mixture of baking soda and vinegar. Pour the baking soda down the drain, followed by vinegar. Let it sit for a while, then flush with hot water.

What should I do if my electrical outlets stop working?

If your electrical outlets stop working, check if the GFCI outlet has tripped. Press the “reset” button on the GFCI outlet. If the outlets still don’t work, contact an electrician.

How can I fix a leaky faucet?

To fix a leaky faucet, turn off the water supply, replace the washer or cartridge, and reassemble the faucet. Turn on the water to check for leaks.

What are some common appliance issues and their fixes?

Common appliance issues include refrigerators not cooling, washing machines not draining, and ovens not heating. Refer to the respective sections in this article for troubleshooting tips.

How can I prevent plumbing problems?

To prevent plumbing problems, avoid pouring grease and oil down the drain, use drain catchers to prevent hair and debris buildup, and schedule regular maintenance with a professional plumber.

Remember, if you encounter any issues that you’re not comfortable fixing yourself, don’t hesitate to contact East Valley Handyman at 480-500-6935 or visit our website here to request professional assistance. Our experienced team is ready to help you with all your household repairs and maintenance needs.

The Ultimate Guide to Repairing a Broken Window

Welcome to our comprehensive guide on repairing a broken window! At East Valley Handyman, we understand the importance of maintaining a safe and functional home. A broken window can not only compromise your security but also impact the energy efficiency of your house. In this ultimate guide, we will provide you with step-by-step instructions and valuable tips to help you repair your broken window effectively. Whether you’re a seasoned DIY enthusiast or a beginner looking to tackle this project, this guide has got you covered!

FAQ

Q: What safety precautions should I take when dealing with broken glass?

A: When working with broken glass, it’s crucial to prioritize safety. Wear thick gloves, safety goggles, and protective clothing to prevent injuries from sharp edges. Remove any broken glass carefully and dispose of it properly.

Q: Can I repair a broken window myself, or should I hire a professional?

A: The complexity of the repair depends on the extent of the damage and your DIY skills. Minor cracks or small glass chips can often be repaired by homeowners. However, for larger breaks or if you’re unsure, it’s advisable to seek professional assistance to ensure a proper and safe repair.

Q: How long does it take to repair a broken window?

A: The time required for window repair can vary depending on factors such as the size of the window, the type of damage, and your level of experience. Generally, it can take anywhere from a couple of hours to a full day to complete the repair process.

Q: What type of glass should I choose for my replacement window?

A: When choosing replacement glass, consider factors such as energy efficiency, durability, and security. Common options include single-pane, double-pane, or laminated glass. It’s recommended to consult with a professional or a glass specialist to determine the best choice for your specific needs.

Q: Are there any cost-effective alternatives to replacing the entire window?

A: In some cases, you may be able to repair minor damage without replacing the entire window. For example, if only the glass is damaged, it’s possible to replace just the glass pane rather than the entire window frame. Assess the extent of the damage and consult with a professional to explore the most cost-effective solution.

Introduction

A broken window not only compromises the aesthetics of your home but also poses security and energy efficiency concerns. Repairing a broken window promptly is crucial to maintain a comfortable and safe living environment. In this comprehensive guide, we will take you through the step-by-step process of repairing a broken window. By following our instructions, you’ll be able to restore the functionality and beauty of your window while saving time and money.

Assessing the Damage

Before you begin the repair process, it’s essential to assess the damage to determine the best course of action. Inspect the window frame, glass, and surrounding components for any cracks, chips, or signs of damage. Take measurements and photographs to ensure accurate replacements. Identifying the type and extent of the damage will help you plan and gather the necessary tools and materials for the repair.

Gathering the Tools and Materials

To repair a broken window, you’ll need a few essential tools and materials. Make sure you have the following items readily available:

  • Safety gloves and goggles
  • Dust mask
  • Pry bar or putty knife
  • Glazier’s points
  • Glazing compound
  • Replacement glass
  • Window putty
  • Paint scraper
  • Paintbrush
  • Glass cleaner
  • Measuring tape
  • Caulking gun
  • Silicone caulk

Removing the Broken Glass

Removing the broken glass is the first step towards repairing your window. Ensure your safety by wearing protective gloves, goggles, and clothing. Carefully remove any loose glass fragments, and use a putty knife or pry bar to detach the remaining glass from the window frame. Dispose of the broken glass properly to avoid any accidents or injuries.

Measuring and Ordering Replacement Glass

Accurate measurements are essential for ordering the correct replacement glass. Measure the height, width, and thickness of the opening in the window frame. Double-check the measurements to ensure they are precise. Once you have the measurements, you can order the replacement glass from a local glass shop or online. Be sure to consult with the supplier to determine the appropriate type of glass for your window.

Preparing the Window Frame

Before installing the replacement glass, you’ll need to prepare the window frame. Start by removing any old putty or glazing compound using a paint scraper. Clean the frame thoroughly, ensuring it’s free from debris and dust. Applying a primer or paint to the frame can help protect it from moisture and extend its lifespan.

Installing the New Glass

Carefully place the replacement glass into the prepared window frame. Secure it in place using glazier’s points, evenly spaced around the edges. Apply glazing compound or putty along the edges to seal the glass and hold it firmly in place. Smooth out the compound with a putty knife, ensuring a neat and uniform appearance.

Sealing and Insulating the Window

To enhance the energy efficiency of your repaired window, it’s essential to seal and insulate it properly. Use a high-quality silicone caulk to seal any gaps between the window frame and the glass. Apply a continuous bead of caulk along the edges, ensuring a tight seal. This step will prevent drafts and improve the insulation of your window.

Conclusion

Repairing a broken window is a manageable task that can greatly improve the safety and energy efficiency of your home. By following our ultimate guide and taking the necessary precautions, you’ll be able to tackle this project with confidence. However, if you’re unsure or prefer professional assistance, don’t hesitate to reach out to East Valley Handyman. Our experienced team is ready to provide efficient and reliable window repair services. Give us a call at 14805006935 or visit our website www.eastvalleyhandyman.com to request our assistance. Take the first step towards a secure and well-maintained home today!

5 Common Electrical Problems and How to Fix Them

As a homeowner, you depend on your electrical system to power your daily activities. However, electrical problems are inevitable and can occur at any time. When faced with electrical issues, it’s important to act fast and address them promptly to avoid costly damages and potential hazards. In this blog post, we’ll discuss five common electrical problems and how to fix them.

Problem #1: Circuit Breaker Keeps Tripping

A circuit breaker trips to protect your home’s electrical system from overloading. If your circuit breaker trips frequently, it could be a sign of a faulty electrical system. Here’s how to fix it:

  1. Unplug all electrical devices and turn off all lights on the tripped circuit.
  2. Reset the circuit breaker by switching it to the off position and then to the on position.
  3. If the circuit breaker trips again, contact a licensed electrician to assess the situation.

Problem #2: Dead Outlets

A dead outlet is an outlet that doesn’t provide power. Dead outlets can be caused by a variety of issues, including a tripped circuit breaker or a loose wire. Here’s how to fix it:

  1. Check if the circuit breaker is tripped.
  2. If the circuit breaker isn’t tripped, turn off the power to the outlet and remove the outlet cover plate.
  3. Check for any loose or disconnected wires and reconnect them if necessary.
  4. If the outlet still doesn’t work, contact a licensed electrician to assess the situation.

Problem #3: Flickering Lights

Flickering lights are not only annoying but can also be a sign of a more significant electrical problem. Here’s how to fix it:

  1. Check if the light bulb is screwed in tightly.
  2. If the bulb is tight and the flickering persists, try replacing the light bulb with a new one.
  3. If the flickering continues, contact a licensed electrician to assess the situation.

Problem #4: High Electricity Bills

If you notice that your electricity bill has increased significantly, it could be a sign of an electrical problem. Here’s how to fix it:

  1. Unplug all electrical devices when not in use.
  2. Replace incandescent light bulbs with LED bulbs.
  3. Consider upgrading to energy-efficient appliances.
  4. If the problem persists, contact a licensed electrician to assess the situation.

Problem #5: Overloaded Circuit

An overloaded circuit can be dangerous and can lead to a fire hazard. Here’s how to fix it:

  1. Unplug some of the electrical devices on the circuit.
  2. Move some of the electrical devices to a different circuit.
  3. Consider adding a new circuit to distribute the electrical load.
  4. If the problem persists, contact a licensed electrician to assess the situation.

FAQs

Q1: Can I fix electrical problems on my own?

A: While some electrical problems can be fixed on your own, it’s important to know your limits. Attempting to fix a complex electrical issue can be dangerous and lead to costly damages. It’s best to contact a licensed electrician to assess the situation and provide the necessary repairs.

Q2: What should I do if I experience an electrical emergency?

A: If you experience an electrical emergency such as an electrical fire or electrocution, call 911 immediately. Do not attempt to address the issue on your own.

Q3: How often should I have my electrical system inspected?

A: It’s recommended to have your electrical system inspected by a licensed electrician every 5 to 10 years, depending on the age of your home and the condition of your electrical system.

Q4: What should I do if I notice a burning smell coming from an outlet?

A: If you notice a burning smell coming from an outlet, turn off the power to the outlet and do not use it until a licensed electrician can assess the situation. A burning smell is a sign of a serious electrical problem that requires immediate attention.

Q5: Can old electrical wiring be dangerous?

A: Yes, old electrical wiring can be dangerous and can lead to electrical fires or electrocution. If your home has old wiring, it’s important to have it inspected by a licensed electrician and consider upgrading it to a safer and more efficient system.

Conclusion

Electrical problems can be frustrating and dangerous, but with prompt action and the help of a licensed electrician, they can be resolved quickly and effectively. At East Valley Handyman, we understand the importance of a safe and reliable electrical system in your home. Contact us today at +1(480)-500-6935 for all your electrical needs.