When it comes to transforming the look and feel of a room, many homeowners turn to paint as their go-to option. However, wallpaper is an often overlooked alternative that can provide numerous benefits over traditional paint. Not only does wallpaper offer a wide range of personalization and customization options, but it is also cost-effective and relatively easy to install. In this article, we will explore the reasons why wallpaper is a great DIY project for homeowners and provide tips and instructions for every step of the process.
One of the main benefits of wallpaper over paint is the ability to personalize and customize your space. With wallpaper, you have endless options when it comes to patterns, textures, and colors. Whether you prefer a bold and vibrant design or a subtle and understated look, there is a wallpaper out there that will suit your taste. Additionally, wallpaper allows you to add depth and dimension to a room that cannot be achieved with paint alone. By choosing a textured wallpaper, you can create visual interest and make a statement in any space.
Another advantage of using wallpaper is that it is cost-effective and easy to install. While the upfront cost of wallpaper may be higher than paint, it often lasts longer and requires less maintenance. Additionally, installing wallpaper can be a fun and rewarding DIY project that can be completed in just a few days. With the right tools and techniques, even beginners can achieve professional-looking results. So if you’re looking for a budget-friendly way to update your home’s interior, consider giving wallpaper a try.
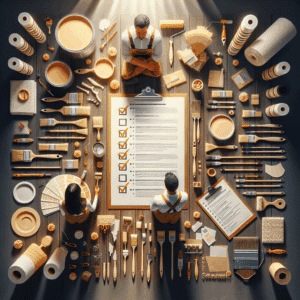
Key Takeaways
- Wallpaper is a great DIY project for homeowners looking to personalize their space.
- Proper preparation of walls is crucial for a professional-looking finish.
- Consider trends, textures, and colors when choosing the right wallpaper.
- Measuring and cutting wallpaper accurately requires the right tools and techniques.
- Step-by-step instructions can help achieve a professional finish when applying wallpaper.
Preparing Your Walls: Tips for Cleaning, Sanding, and Priming
Before you can start applying wallpaper to your walls, it’s important to properly prepare them to ensure a smooth and long-lasting finish. The first step in preparing your walls is to clean them thoroughly. Use a mild detergent or wall cleaner to remove any dirt, grease, or stains. Pay special attention to areas near the kitchen and bathroom, as these tend to accumulate more grime. Once the walls are clean, rinse them with water and allow them to dry completely before moving on to the next step.
After cleaning the walls, it’s time to sand them for a smooth surface. Use a fine-grit sandpaper and gently sand the walls in a circular motion. This will help remove any imperfections and create a smooth surface for the wallpaper to adhere to. Be sure to wipe away any dust or debris with a damp cloth before moving on to the next step.
The final step in preparing your walls is to prime them for better adhesion. Priming the walls will help the wallpaper stick better and prevent it from peeling or bubbling over time. Choose a primer that is specifically designed for wallpaper and apply it evenly to the walls using a roller or brush. Allow the primer to dry completely before proceeding with the wallpaper installation.
Choosing the Right Wallpaper: Trends, Textures, and Colors to Consider
When it comes to choosing the right wallpaper for your space, there are several factors to consider. First and foremost, you’ll want to stay up-to-date with current wallpaper trends. This will ensure that your space looks modern and stylish. Currently, some popular trends include botanical prints, geometric patterns, and metallic accents. However, it’s important to choose a design that you love and that complements your personal style.
In addition to trends, you’ll also want to consider different textures and patterns available. Wallpaper comes in a variety of textures, including smooth, embossed, and textured. Each texture creates a different look and feel in a room, so be sure to choose one that suits your aesthetic preferences. Similarly, there are countless patterns available, ranging from traditional floral designs to contemporary abstract prints. Take your time exploring different options and choose a pattern that speaks to you.
Lastly, consider the colors of the wallpaper and how they will complement your space. If you have a small room, lighter colors can help create the illusion of more space. On the other hand, if you have a large room, darker colors can add warmth and coziness. Additionally, consider the existing color scheme of your furniture and decor and choose a wallpaper that will harmonize with these elements. By carefully considering these factors, you can choose a wallpaper that will transform your space into a personalized oasis.
Measuring and Cutting Wallpaper: Tools and Techniques for Accurate Results
| Measurement Tool | Technique | Accuracy |
|---|---|---|
| Tape Measure | Measure from ceiling to baseboard and add 4-6 inches for trimming | High |
| Laser Level | Projects a straight line for accurate placement | Very High |
| Utility Knife | Use a sharp blade and cut along a straight edge for clean cuts | High |
| Wallpaper Scissors | Use for cutting around corners and intricate areas | High |
| Smoothing Tool | Smooth out air bubbles and wrinkles for a seamless finish | High |
Before you can start applying wallpaper to your walls, you’ll need to measure and cut it to the right size. This step is crucial for achieving a professional-looking finish, so it’s important to take your time and be precise. Start by measuring the height and width of each wall that you plan to cover with wallpaper. Add a few extra inches to each measurement to account for any mistakes or adjustments that may need to be made during installation.
Once you have your measurements, it’s time to cut the wallpaper to the right size. Lay the wallpaper on a clean, flat surface and use a straightedge and a sharp utility knife to make clean cuts. Be sure to cut along the edges of the wallpaper, rather than through the middle, to ensure a seamless finish. If you’re working with patterned wallpaper, be sure to match up the patterns as you cut each piece.
To make the cutting process easier and more accurate, there are several tools that you can use. A wallpaper cutting guide is a handy tool that helps you make straight cuts without having to rely solely on your eye. Additionally, a self-healing cutting mat can protect your work surface and provide a smooth cutting surface. Finally, a sharp utility knife with replaceable blades is essential for making clean cuts without tearing or fraying the wallpaper.
Applying Wallpaper: Step-by-Step Instructions for a Professional Finish
Now that you have your wallpaper cut to the right size, it’s time to start applying it to the walls. Before you begin, make sure you have all the necessary tools and materials on hand, including wallpaper adhesive, a wallpaper brush or roller, a smoothing tool, and a sponge or damp cloth. It’s also a good idea to have a bucket of clean water nearby for rinsing your tools.
Start by preparing the wallpaper for installation. If you’re using pre-pasted wallpaper, you’ll need to activate the adhesive by soaking the wallpaper in water according to the manufacturer’s instructions. If you’re using unpasted wallpaper, you’ll need to apply adhesive to the back of the wallpaper using a brush or roller. Be sure to follow the manufacturer’s instructions for mixing and applying the adhesive.
Once the wallpaper is ready, it’s time to start applying it to the walls. Start in one corner of the room and work your way across the wall. Use a smoothing tool or your hands to press the wallpaper onto the wall, starting from the top and working your way down. Be sure to smooth out any bubbles or wrinkles as you go. If you do encounter any bubbles or wrinkles, use a smoothing tool or your hands to gently push them out towards the edges of the wallpaper.
Continue applying the wallpaper in this manner until you have covered the entire wall. Be sure to match up any patterns or designs as you go to ensure a seamless finish. If you need to cut around windows, doors, or other obstacles, use a sharp utility knife and a straightedge to make clean cuts. Once all of the wallpaper is applied, use a damp sponge or cloth to wipe away any excess adhesive from the surface of the wallpaper.
Dealing with Common Issues: Wrinkles, Bubbles, and Misalignments
While installing wallpaper can be a relatively straightforward process, there are some common issues that may arise. Wrinkles and bubbles are two of the most common problems that homeowners encounter when installing wallpaper. Fortunately, these issues can be easily fixed with a few simple techniques.
If you notice any wrinkles or bubbles in the wallpaper, start by gently pushing them towards the edges of the wallpaper using a smoothing tool or your hands. If this doesn’t work, you can try using a small pin or needle to create a tiny hole in the center of the bubble. Then, use a smoothing tool or your hands to push out the air and smooth out the bubble. Be careful not to create any tears or rips in the wallpaper while doing this.
Misalignments can also occur when installing wallpaper, especially if you’re working with patterned wallpaper. If you notice that the patterns are not lining up correctly, you can try gently lifting the wallpaper and repositioning it. Use a smoothing tool or your hands to press it back onto the wall and smooth out any bubbles or wrinkles that may have formed. If necessary, you can also use a sharp utility knife to make small adjustments to the wallpaper.
To avoid these issues in the first place, it’s important to take your time and be precise during the installation process. Measure and cut the wallpaper accurately, match up patterns as you go, and smooth out any bubbles or wrinkles immediately. By following these tips, you can achieve a professional-looking finish and avoid any common issues that may arise.
Adding Accents and Borders: Creative Ideas for Customizing Your Wallpaper
One of the great things about wallpaper is its versatility and ability to be customized to suit your personal style. Adding accents and borders is a creative way to take your wallpaper to the next level and create a unique look in your space.
Adding borders to your wallpaper is a popular technique that can help define a space or add visual interest. Borders can be applied at the top, bottom, or middle of a wall, depending on the desired effect. They can be made from the same wallpaper as the rest of the wall or a contrasting pattern or color. To apply a border, simply measure and cut the wallpaper to the desired width and length, and then apply it to the wall using the same techniques as before.
Using wallpaper as an accent wall is another creative way to customize your space. An accent wall is a single wall in a room that is painted or covered in a different material than the rest of the walls. By choosing a bold and vibrant wallpaper for your accent wall, you can create a focal point in the room and add visual interest. This is especially effective in rooms with neutral-colored walls, as it can add a pop of color and personality.
Finally, consider mixing and matching different patterns and textures to create a unique look in your space. Wallpaper doesn’t have to be limited to just one pattern or texture. By combining different patterns and textures, you can create a visually dynamic and interesting space. For example, you could use a textured wallpaper on one wall and a patterned wallpaper on another. Just be sure to choose patterns and textures that complement each other and create a cohesive look.
Removing Old Wallpaper: Safe and Effective Methods for a Fresh Start
If you’re looking to update your space with new wallpaper, you’ll first need to remove any existing wallpaper from the walls. While this may seem like a daunting task, there are several safe and effective methods that can make the process easier.
Before you start removing the wallpaper, it’s important to gather all the necessary tools and materials. You’ll need a scoring tool or sandpaper, a wallpaper steamer or hot water, a putty knife or scraper, and a sponge or cloth. It’s also a good idea to protect your floors and furniture with drop cloths or plastic sheeting.
To remove the wallpaper, start by scoring the surface of the wallpaper with a scoring tool or sandpaper. This will help the water or steam penetrate the wallpaper and loosen the adhesive. Next, use a wallpaper steamer or hot water to saturate the wallpaper. If using hot water, be sure to wear gloves to protect your hands from the heat. Allow the water or steam to penetrate the wallpaper for a few minutes.
Once the wallpaper is saturated, use a putty knife or scraper to gently lift the edges of the wallpaper. Be careful not to damage the underlying wall surface. Once you have lifted an edge, use your hands or the scraper to peel away the wallpaper in large sections. If you encounter any stubborn areas, use a sponge or cloth to apply more hot water or steam and then try again.
After removing all of the wallpaper, use a sponge or cloth to wipe away any remaining adhesive from the walls. If necessary, you can use a solution of warm water and mild detergent to help remove stubborn adhesive. Be sure to rinse the walls with clean water and allow them to dry completely before proceeding with any new wallpaper installation.
Maintaining Your Wallpaper: Tips for Cleaning and Repairing Damages
Once your wallpaper is installed, it’s important to properly maintain it to ensure its longevity and keep it looking its best. While wallpaper is generally durable and easy to clean, there are some tips and techniques that can help you keep it in pristine condition.
To clean your wallpaper, start by dusting it regularly with a soft brush or feather duster. This will help remove any loose dirt or debris that may have accumulated on the surface. If you notice any stains or marks on the wallpaper, you can spot clean them using a mild detergent and warm water. Be sure to test any cleaning solution on a small, inconspicuous area of the wallpaper first to ensure that it doesn’t cause any damage.
If your wallpaper becomes damaged, such as torn or ripped, it’s important to repair it as soon as possible to prevent further damage. Small tears or rips can be repaired using a small amount of wallpaper adhesive or glue. Simply apply a small amount of adhesive to the back of the torn section and press it back onto the wall. Use a smoothing tool or your hands to smooth out any bubbles or wrinkles. For larger tears or rips, you may need to replace the entire section of wallpaper.
To extend the life of your wallpaper, there are a few additional tips that you can follow. Avoid placing furniture or objects directly against the wallpaper, as this can cause damage over time. Additionally, avoid exposing the wallpaper to excessive moisture or humidity, as this can cause it to peel or bubble. Finally, be sure to follow any specific care instructions provided by the manufacturer to ensure that your wallpaper stays looking its best for years to come.
Enjoying the Benefits of a Beautiful and Personalized Space
In conclusion, wallpaper is a great DIY project for homeowners who are looking to transform their space and add a personal touch. With its numerous benefits over paint, including personalization options, cost-effectiveness, and ease of installation, wallpaper is a versatile and stylish choice for any home.
By following the tips and instructions provided in this article, you can successfully prepare your walls, choose the right wallpaper, measure and cut it accurately, apply it with professional results, and address any common issues that may arise. Additionally, by adding accents and borders, removing old wallpaper safely and properly cleaning up after the project, you can achieve a polished and stylish look for your walls. It is important to take your time and be patient throughout the process, as rushing can lead to mistakes and unsatisfactory results. With the right tools and techniques, you can transform any room in your home with beautiful wallpaper that reflects your personal style.
If you’re looking for more information on wallpaper installation and repair, check out this helpful article on “The Magic Touch: How a Professional Handyman Can Perfect Your Wallpaper Application.” This article dives into the expertise and skills required to achieve flawless wallpaper application, highlighting the benefits of hiring a professional handyman for this task. From proper surface preparation to precise measurements and seamless installation techniques, a skilled wallpaper handyman can transform your walls with ease. To learn more about the art of wallpaper installation, click here.