Welcome to our ultimate guide on “The Art of Tile Installation: Handyman Secrets for a Flawless Look.” At East Valley Handyman, we take pride in our expertise in tile installation, and we are excited to share our knowledge to help you achieve a stunning and flawless tile project for your home. Whether you’re considering a bathroom makeover or updating your kitchen backsplash, proper tile installation is key to achieving a beautiful and durable finish. In this blog post, we will unravel the secrets of tile installation and empower you to create a space that reflects your style and personality.
Step 2: The Importance of Professional Tile Installation
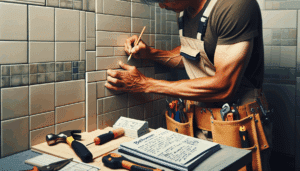
Tile installation may seem like a simple task, but it requires precision and skill to ensure a flawless outcome. Hiring a professional handyman, like the ones at East Valley Handyman, can make a significant difference in the success of your tile project. Our experienced handymen have the expertise and tools to handle different types of tiles and surfaces, ensuring a seamless and visually appealing installation. With professional help, you can avoid costly mistakes and enjoy the peace of mind that comes with a job well done.
Step 3: Choosing the Right Tiles for Your Project
Material and Durability
Selecting the right tile material is essential for long-lasting results. Ceramic and porcelain tiles are popular choices for their durability and versatility. Natural stone tiles, like marble and travertine, offer a luxurious and timeless appeal. Consider the location of your project and the tile’s exposure to moisture, wear, and tear to make the best material choice.
Size and Shape
Tiles come in various sizes and shapes, from classic squares and rectangles to trendy hexagons and mosaics. Larger tiles can create an illusion of space in smaller rooms, while smaller tiles offer intricate designs and patterns. Choose a size and shape that complements your overall design vision.
Color and Design
The color and design of your tiles play a significant role in the aesthetic appeal of your space. Light-colored tiles can make a room feel more spacious and airy, while bold colors add character and drama. Experiment with different tile patterns, such as herringbone or basketweave, to create unique looks.
Step 4: Preparing for Tile Installation
Surface Preparation
Proper surface preparation is crucial for a successful tile installation. Ensure that the surface is clean, dry, and level. Remove any existing flooring or debris and repair any cracks or imperfections before starting the installation process.
Gathering the Right Tools and Materials
Having the right tools and materials on hand will streamline the installation process. You’ll need essentials like a notched trowel, tile spacers, a tile cutter, and a rubber float for grouting. Invest in high-quality tools for professional-looking results.
Step 5: Step-by-Step Tile Installation Guide
Marking Layout and Setting Guidelines
Before applying adhesive, plan the layout of your tiles. Use a chalk line or a straightedge to create guidelines for precise alignment. Dry-lay the tiles first to ensure a perfect fit and make any adjustments as needed.
Applying Mortar or Adhesive
Apply thin-set mortar or adhesive on the surface using the notched trowel. Work in small sections to prevent the adhesive from drying out before placing the tiles. Press each tile firmly into the mortar, using the tile spacers to maintain even gaps.
Placing the Tiles
Carefully lay the tiles following the marked guidelines. Avoid sliding the tiles into place, as it may disturb the adhesive. Check for level and evenness as you go along.
Cutting Tiles for Edges and Corners
Measure and mark tiles that need to be cut to fit the edges and corners. Use a tile cutter or a wet saw to make precise cuts. Take your time to ensure accurate measurements and cuts for a professional finish.
Grouting and Finishing Touches
Once the adhesive has set, remove the tile spacers and prepare for grouting. Choose the appropriate grout color and mix it according to the manufacturer’s instructions. Apply the grout using a rubber float, pressing it into the gaps between tiles. Wipe off excess grout with a damp sponge, and buff the tiles for a clean look.
Step 6: Common Tile Installation Mistakes to Avoid
- Not properly preparing the surface before installation.
- Using the wrong adhesive or mortar for the tile material.
- Incorrectly measuring and cutting tiles, leading to uneven edges and gaps.
- Rushing through the grouting process, resulting in uneven grout lines and a messy appearance.
Step 7: Tile Maintenance Tips for Longevity
- Regularly clean your tiles with mild, non-abrasive cleaners to maintain their luster.
- Use rugs or mats in high-traffic areas to protect tiles from wear.
- Promptly address any stains or spills to prevent permanent discoloration.
- Seal natural stone tiles to protect them from moisture and stains.
Step 8: FAQ (Frequently Asked Questions)
Can I install tiles myself, or should I hire a professional?
While DIY tile installation is possible, it requires skill and patience to achieve professional results. Hiring a skilled handyman from East Valley Handyman ensures a flawless and efficient installation.
How long does tile installation typically take?
The duration of tile installation depends on the size and complexity of the project. Our experienced handymen work efficiently to minimize disruption and complete the job promptly.
What type of grout should I use for my tiles?
The type of grout you use depends on the tile material and the width of the grout lines. Our experts can help you choose the right grout for your specific project.
Can I install tiles over existing flooring?
In some cases, you can install tiles over existing flooring, but proper preparation and evaluation of the current surface are crucial. Our professionals can assess the feasibility of this option for your project.
How do I clean and maintain my tiles after installation?
Regularly sweep or vacuum your tiles to remove dirt and debris. Use a damp mop with a mild cleaner for routine cleaning, and address any stains or spills promptly.
At East Valley Handyman, we understand the intricacies of tile installation and are committed to delivering outstanding results. For a flawless and visually stunning tile project, call us at 480-500-6935 or visit our website at eastvalleyhandyman.com to schedule a consultation.